
You are a person with financial plans and want to manage them well. Notion will provide Expense Tracker for you to experience. Whether you access your finances by manually entering expenses wherever you’ve just transacted or by importing statement spreadsheets from your bank and categorizing the transactions you have, the layout you use for management will be the same. We still need a categorization column, expenses spent, a place to upload copies of receipts, space to store notes, and a few other transactional information if you need it.

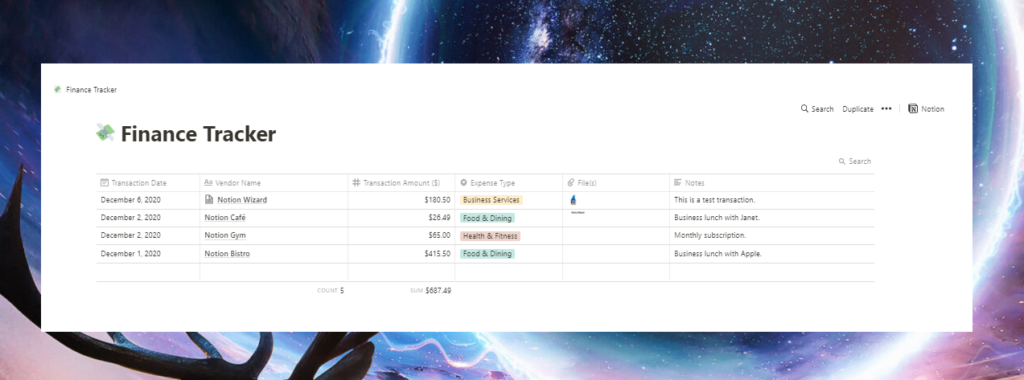
You can also change this financial management depending on your own profession. If you are a business owner, you can include a column of income, a certain business transaction, and a column that stores which bank account/credit card you use for each transaction.

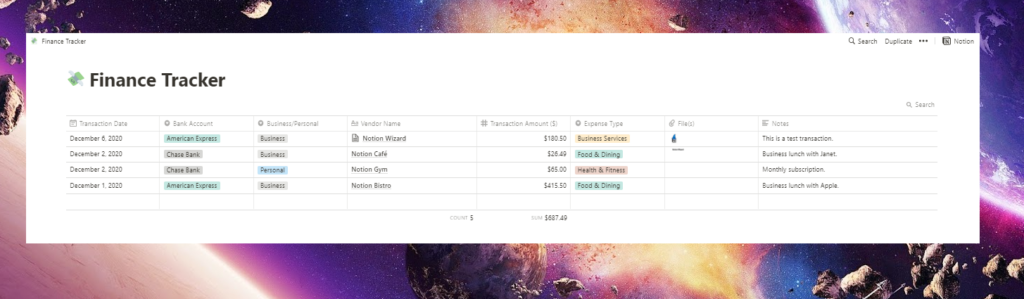
What I like most about tracking expenses here is the different viewing options that have been provided by Notion. You can choose to create dedicated views for different transaction types, bank accounts and dates, and can have them sorted by transaction date, vendor name, and even transaction size .
Use the Expense Tracker Template
A simple Expense Tracker template will help you get all the work done when building this system. Just duplicate it in your Workspace, make any changes like space for other information you need to record, then start importing transactions. It won’t take long for you to do this.


How to enter transactions via spreadsheet
This is where things get a little complicated. The above sample will work when adding transactions manually, but things will get worse when trying to import a bunch of transactions. This means that you will need to regenerate the template whenever you import a new set of data (in the form of a CSV file).
Considering you will enter one wave of trades at a time, this is not a deal breaker. It doesn’t take more than a minute to add the columns you require and a minute to remove the ones you don’t. When you’ve done it the first time, it will be second nature; You won’t even think about what you’re doing.
So how do you enter transactions? First you need to retrieve their CSV from your bank. Understood? Just select ‘Import’ from the sidebar on Notion, followed by ‘CSV’, then the file. It will then start uploading. Depending on the size of the file, a minute or so it will be available in your Workspace.