
Notion is a strong application that enables users to generate, arrange, and cooperate on diverse forms of material. This tool facilitates the efficient management of individual projects, collaborative team tasks, and overall company operations. Nevertheless, there can be instances where you desire to eliminate certain information or gaps that you have generated in Notion. This article will show you how to delete workspace and teamspace in Notion.
What is the rationale behind wanting to eliminate a workspace and teamspace in Notion? There are multiple possible explanations for this phenomenon. Perhaps you no longer require them upon completing a project or departing from a team, or you choose to tidy up your sidebar. Perhaps you desire to commence anew by establishing a fresh office or teamspace.
Despite of the cause, eliminating a workspace and teamspace in Notion is a straightforward and expeditious process. However, let us begin by addressing the fundamental concepts.
COMPARISON OF WORKSPACE AND TEAMSPACE IN NOTION
A workspace in Notion serves as a platform for efficiently managing information and generating content for distinct and individual entities. Within a workspace, one has the ability to observe the pages and databases that are associated with it. The pages within a workspace that are allowed are referred to as teamspace.
A workspace has the capability to contain numerous teamspaces. Teamspaces are designated zones specifically allocated for certain teams inside the organization. They can have varying degrees of visibility and permission, ranging from open, closed, to private.
Having understood the fundamental distinction between a workspace and a teamspace, it is imperative to be aware of specific considerations prior to removing a Notion teamspace.
IMPORTANT CONSIDERATIONS PRIOR TO DELETING A TEAMSPACE IN NOTION
Prior to deleting a teamspace in Notion, it is crucial to be aware of the following key points:
Deleting a teamspace in Notion will lead to irreversible loss of data. This encompasses all the content included within it, encompassing pages, documents, databases, and files, and it is not possible to retrieve them.
When a teamspace is deleted, all team members will lose their access to the content included within it. Deleting the teamspace will cause disruption to existing work and communication if your team depends on the information or actively collaborates on projects within it.
Deleting your teamspace could potentially impact any integrations or third-party services that are tied to it.
Removing a teamspace will nullify permissions and any associated access. The deletion will eliminate any shared access or specific permissions that team members or guests have within the teamspace.
Deleting the teamspace could potentially cause broken links if the pages inside it are connected to other pages or databases in your workspace. Ensure to thoroughly examine and revise any dependencies to prevent the loss of significant associations.
Outlined here are several key considerations one must be aware of prior to removing a teamspace. If you are curious, departing from and eradicating a Notion teamspace are not synonymous; please continue reading.
COMPARISON OF THE ACTIONS OF LEAVING AND DELETING A TEAMSPACE IN NOTION
Upon exiting a teamspace, your membership is terminated, hence rendering you unable to modify or retrieve its contents. Nevertheless, it is important to emphasize that departing from a teamspace has no impact on other members or the teamspace itself.
Deleting a teamspace entails the permanent elimination of both the teamspace itself and all of its associated material from Notion. This encompasses various forms of information, such as pages, documents, databases, and any data contained within the teamspace. Furthermore, the irreversible action of deleting a teamspace has a profound impact on all members, since they will no longer have the ability to access it. Now, let’s go to the steps.
Steps to Delete a Workspace in Notion on Desktop
Deleting a workspace in Notion is irreversible; there is no possibility of retrieving the removed content. Prior to proceeding with the next steps, it is imperative to safeguard any crucial data by creating a backup.
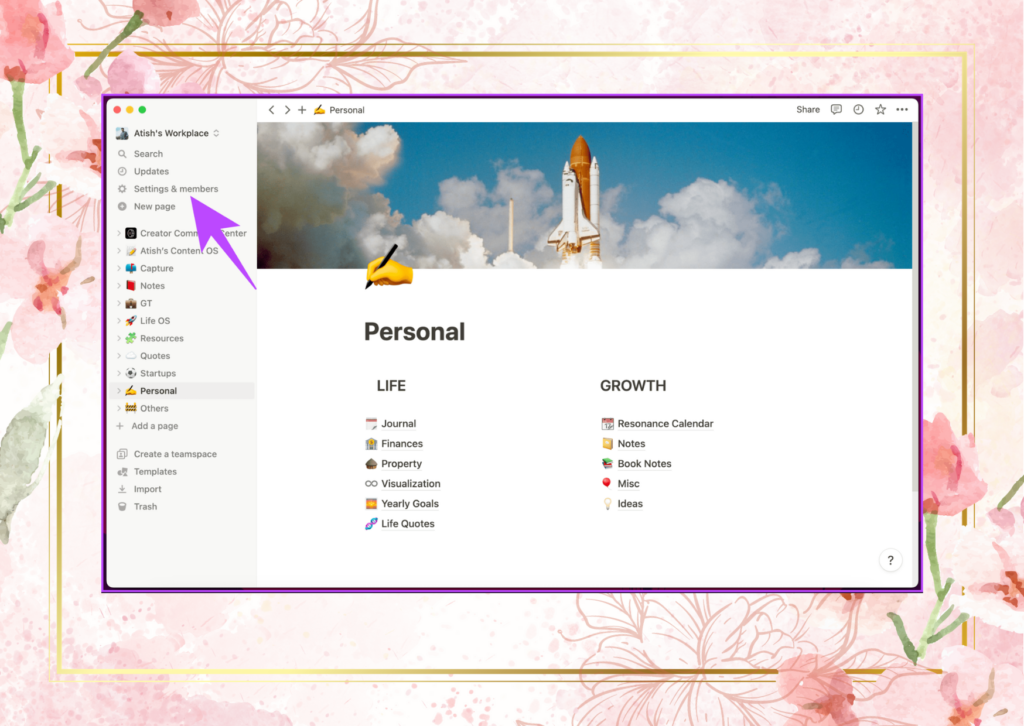
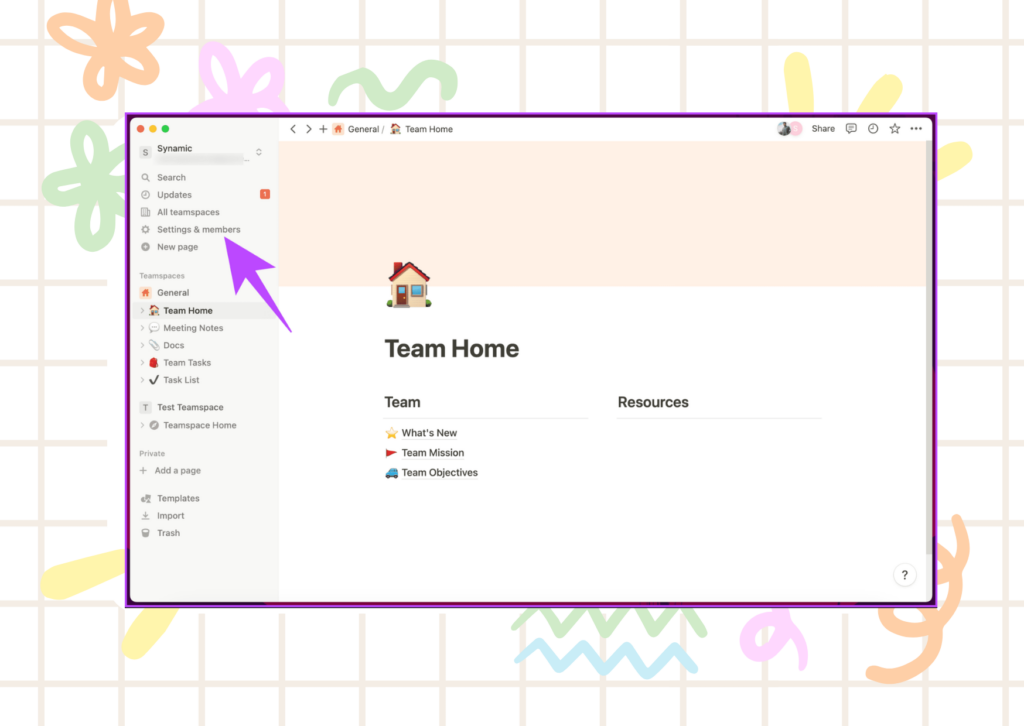
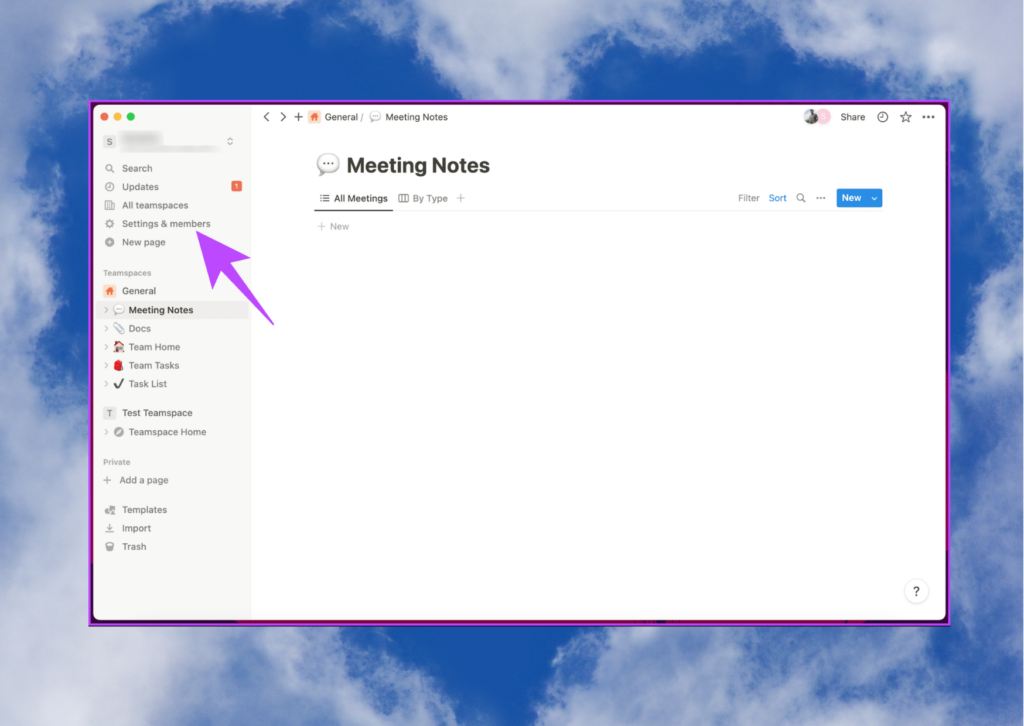
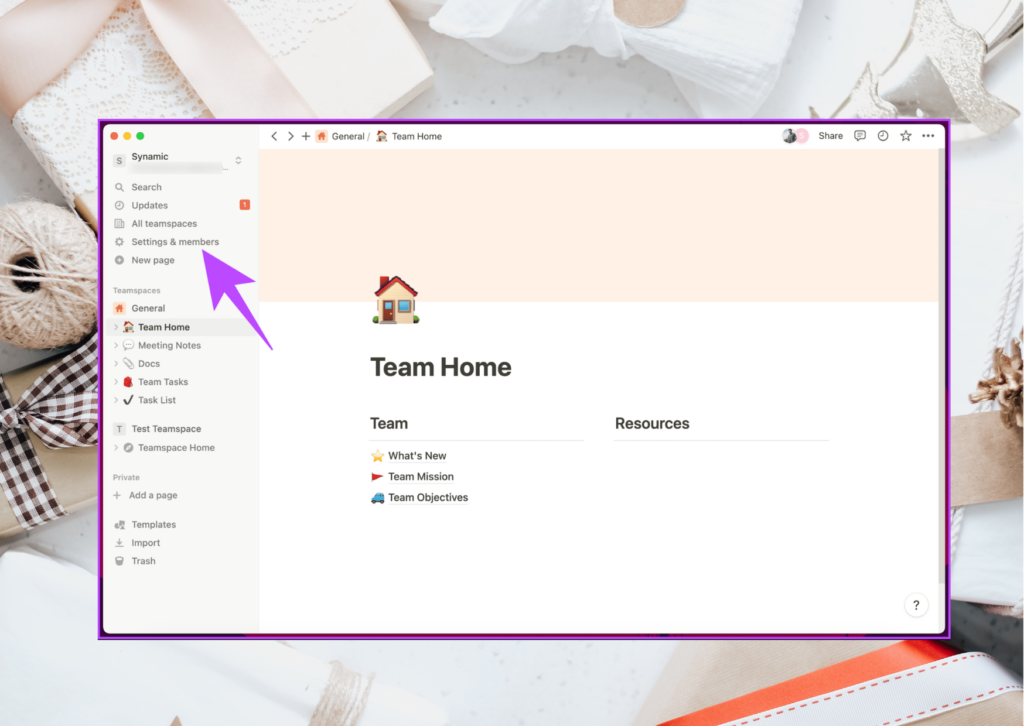
First, launch the Notion application or access the Notion website on your Windows or Mac computer. Then, navigate to the ‘Settings & members’ section located in the left panel.
Caution: Consider confirming that you are in the accurate workspace before proceeding to the subsequent step.
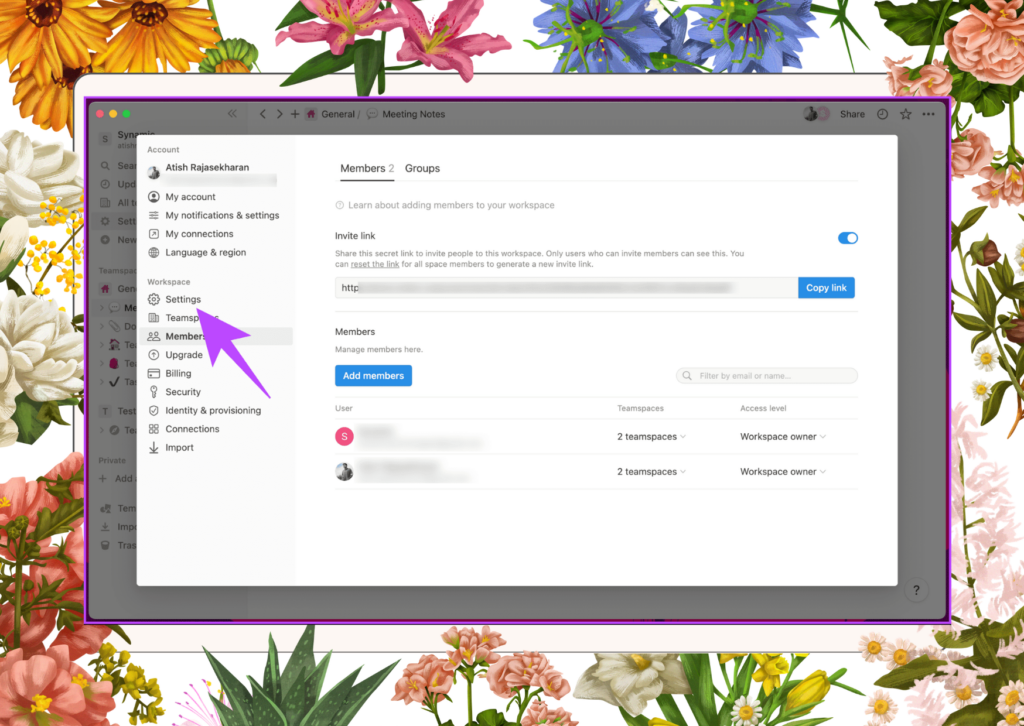
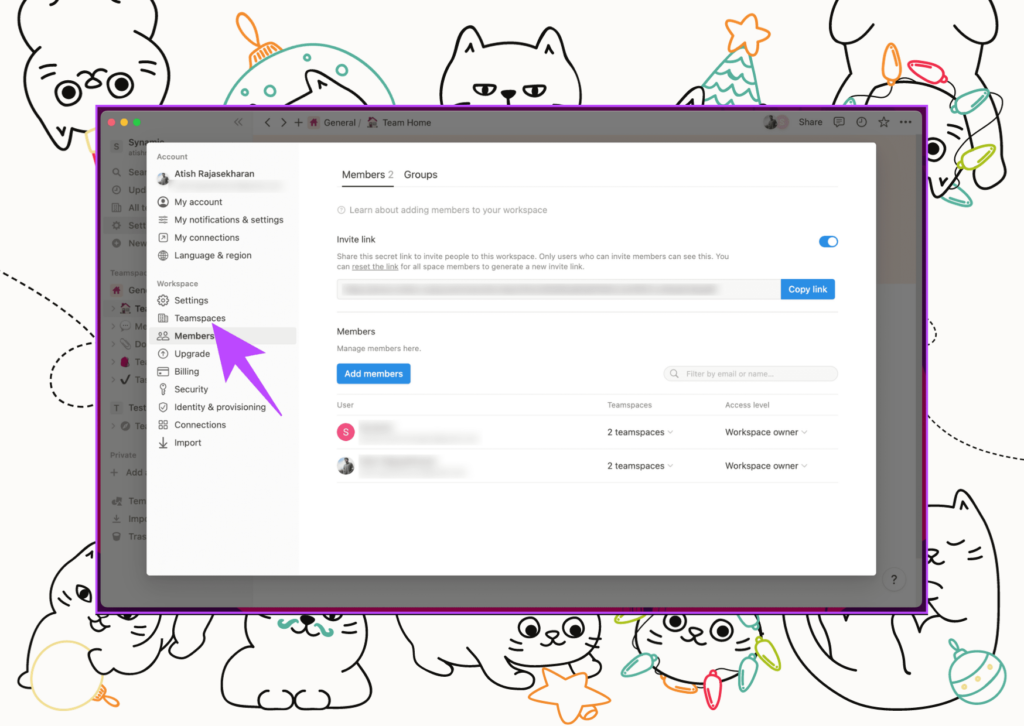
You will be sent to the Members section located under the Settings page.
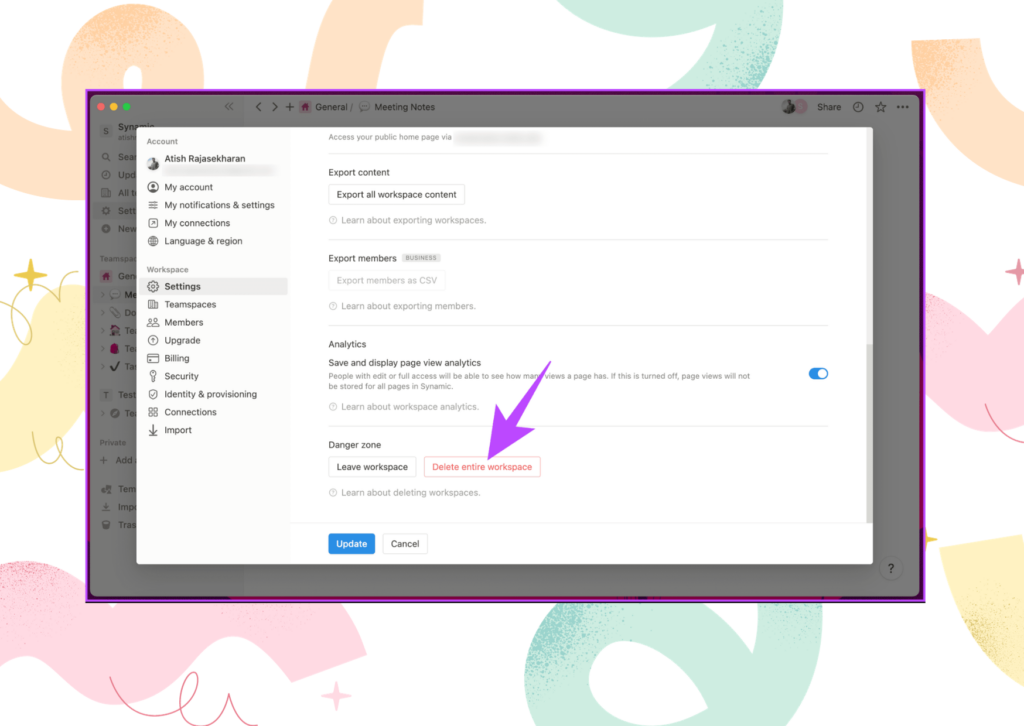
Step 2: Navigate to the Settings option located in the Workspace area on the left side of the screen.

Step 3: Navigate to the Danger Zone area on the right panel and select the ‘Delete whole workspace’ button.
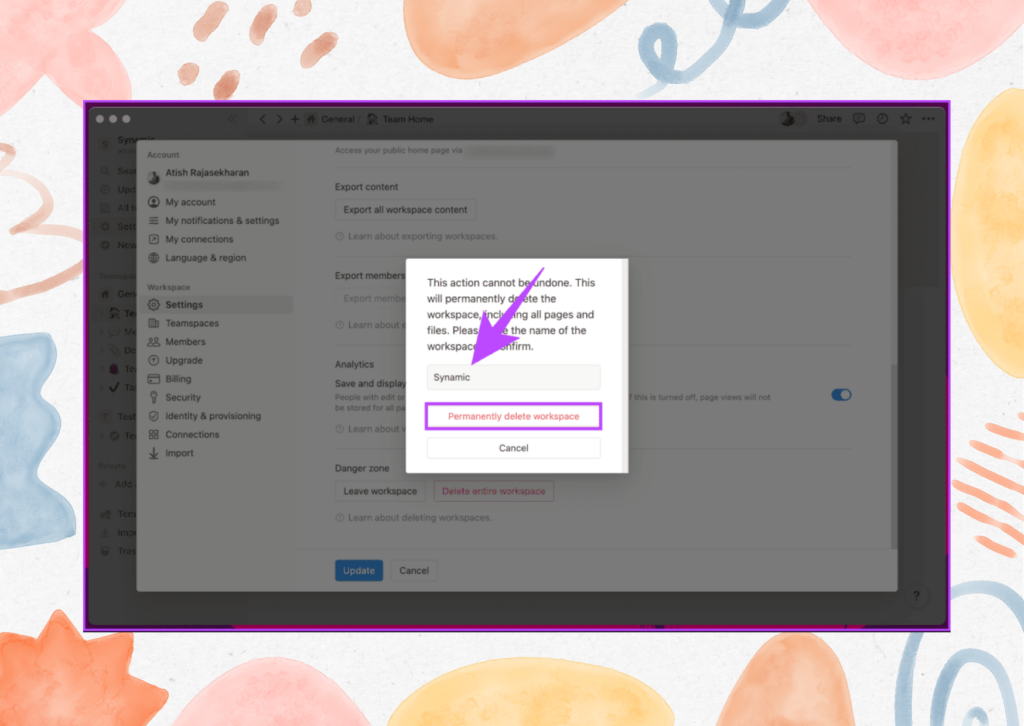
Step 4: Enter the desired workspace name in the pop-up window and select ‘Permanently delete workspace’.
That is the entirety of it. You will be promptly relocated from the workspace and all the associated pages will be erased. Regrettably, the mobile app of Notion does not provide the option to erase the workspace.
However, if you wish to discontinue using a workspace without deleting it, you may easily do so using the Notion mobile app. The procedure is straightforward; continue reading for more details.
HOW TO EXIT A WORKSPACE IN NOTION WITHOUT DELETING IT
Opting to leave a workspace instead of deleting it, assuming you are the owner, presents numerous advantages. The two primary factors are:
When you leave a workspace, the collaboration history is retained, allowing you to review and refer back to discussions, comments, or modifications made by other team members.
You have the ability to promptly rejoin the workspace at any time in the future without causing any disruption to the workflow of others.
Exiting a Notion workspace provides the benefits of ease, accessibility, and organization without permanently deleting your data. Allow us to demonstrate the procedures for both desktop and smartphone devices.
Using a computer
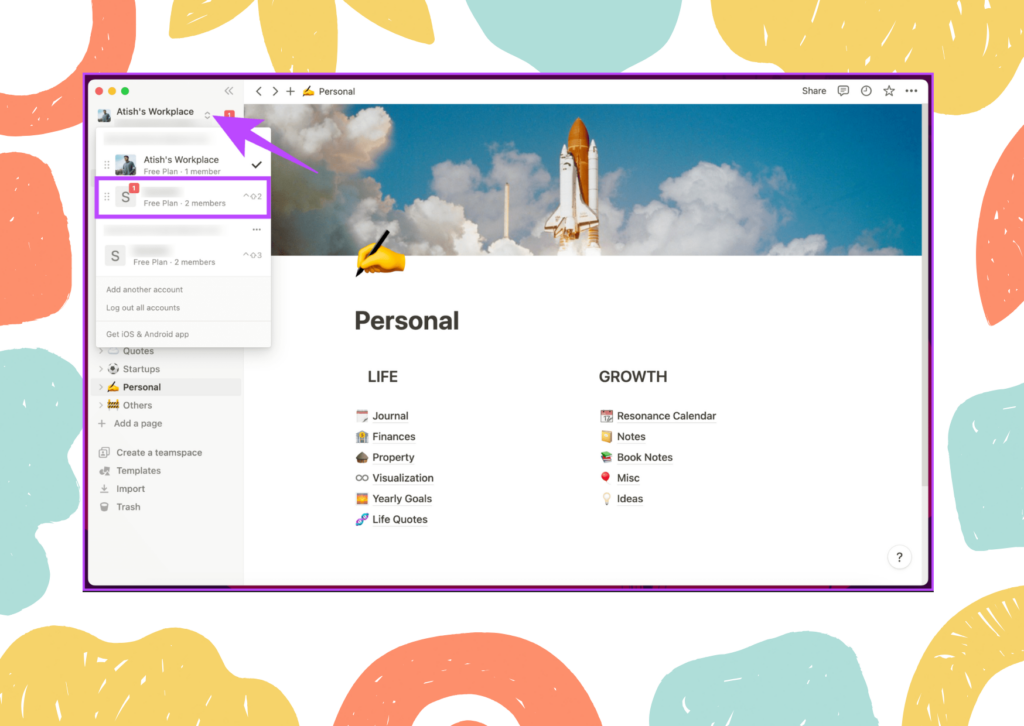
To begin, open the Notion application on your Windows or Mac computer and select the workspace name shown in the upper left corner.
Step 2: Choose the desired workspace from the drop-down option to exit.
Step 3: Navigate to the ‘Settings & member’ option located in the left panel.
You will be sent to the Member section inside the Settings screen.
Step 4: Navigate to the Settings option located in the Workspace area on the left side of the screen.
Step 5: Navigate to the Danger Zone area on the right panel and select the Leave workplace button.
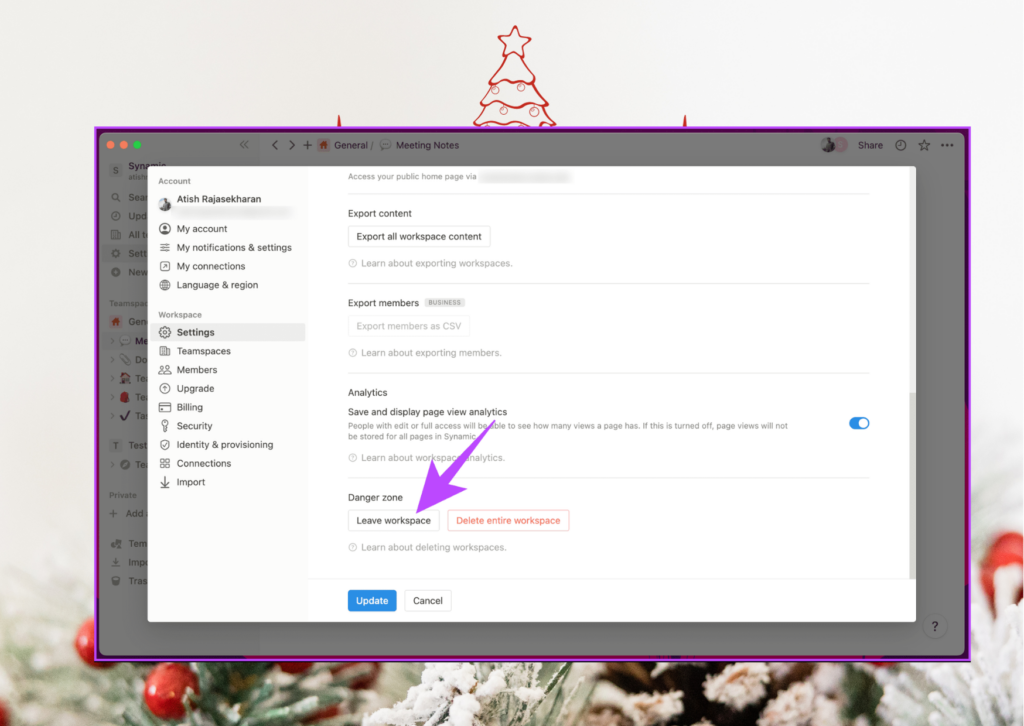
Please note that as a workspace owner, you will have the option to leave the workspace, which will be displayed alongside the option to delete the entire workspace.
Step 6: In the pop-up window, choose the option “Leave” to confirm your decision.
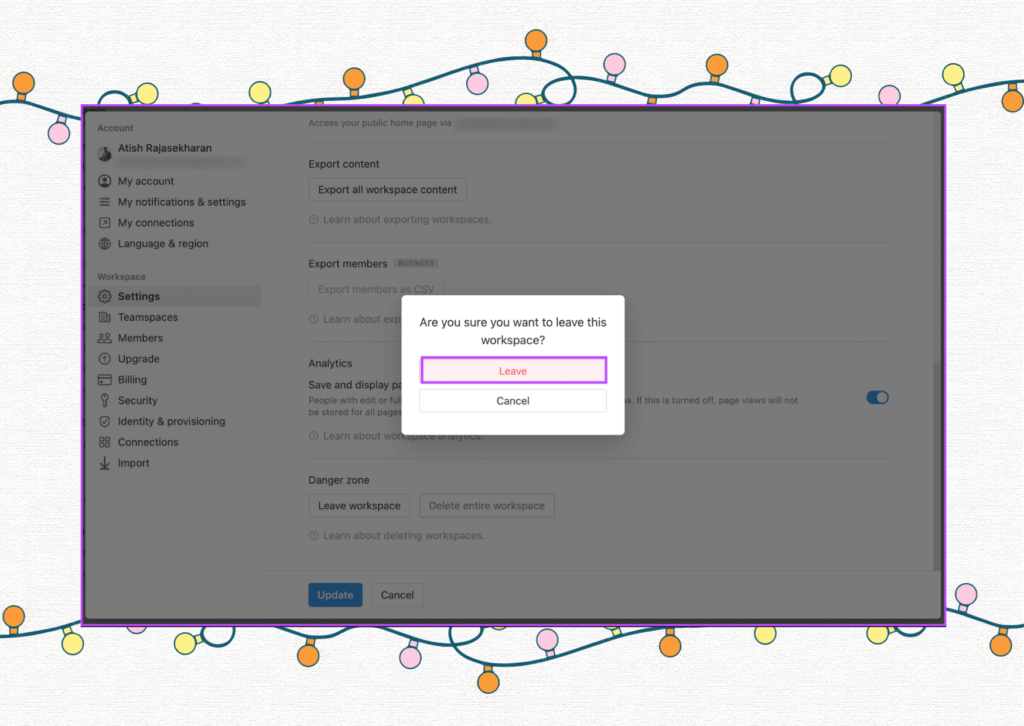
That is the extent of it. Upon removal, you will promptly lose access to the workspace and all its associated content.
Using the Notion mobile application
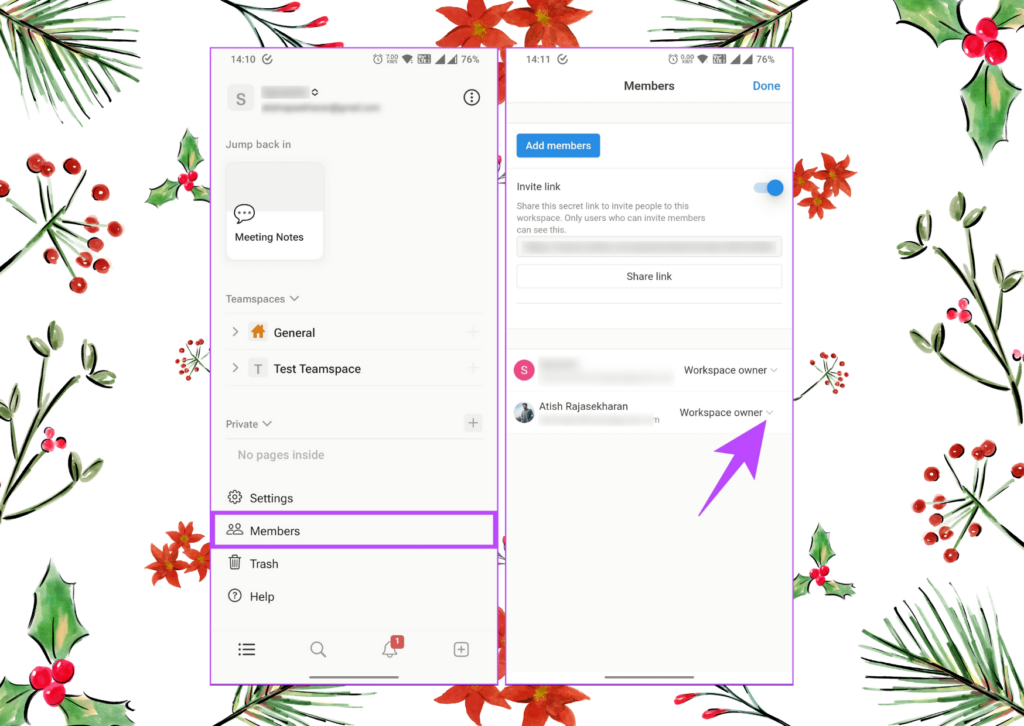
First, open the Notion application and click on the name of the workspace located in the upper left corner.
Step 2: Select the workspace you wish to exit from the lower sheet.

Step 3: After entering the workspace, select the Members option by tapping on it.
Step 4: On the Members screen, select the chevron (down arrow) symbol adjacent to your account.
Step 5: Select “Leave workspace” from the bottom sheet, and then touch “Remove” in the pop-up to confirm.
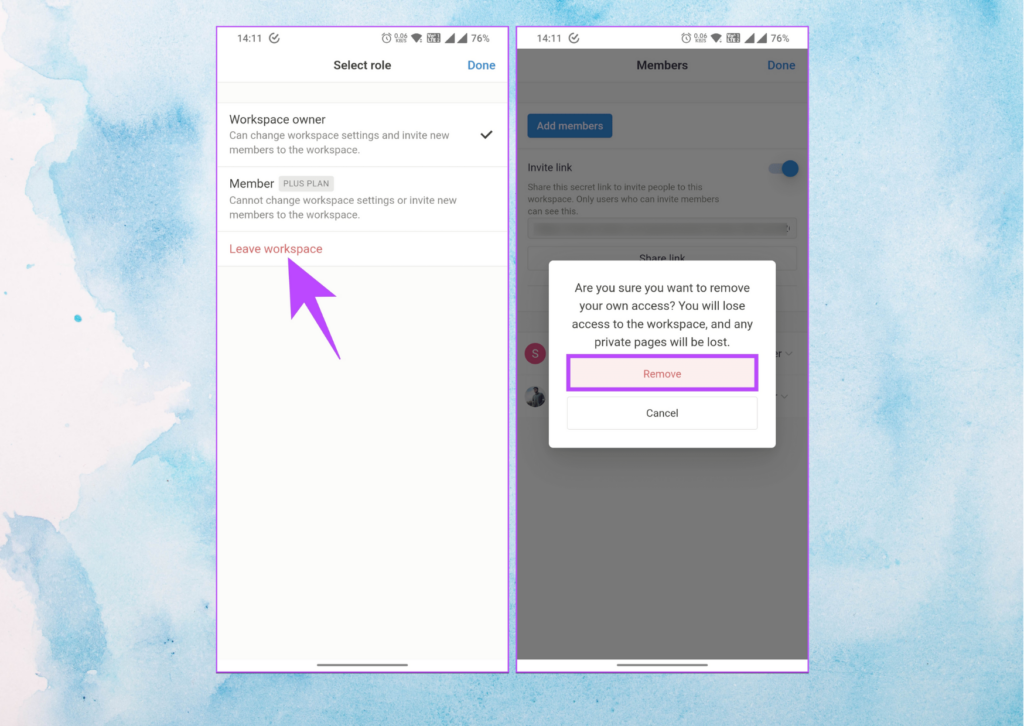
Here it is. You will be reverted to your default account and forfeit access to the workspace you were previously affiliated with.
GUIDE TO DEPARTING FROM A NOTION TEAMSPACE
The Notion teamspace facilitates collaborative work among numerous users in a shared workspace. Nevertheless, there can arise a circumstance where it becomes necessary for you to depart from a Notion teamspace, either due to your exclusion from the team or your lack of need for access to it. Follow the instructions mentioned below.
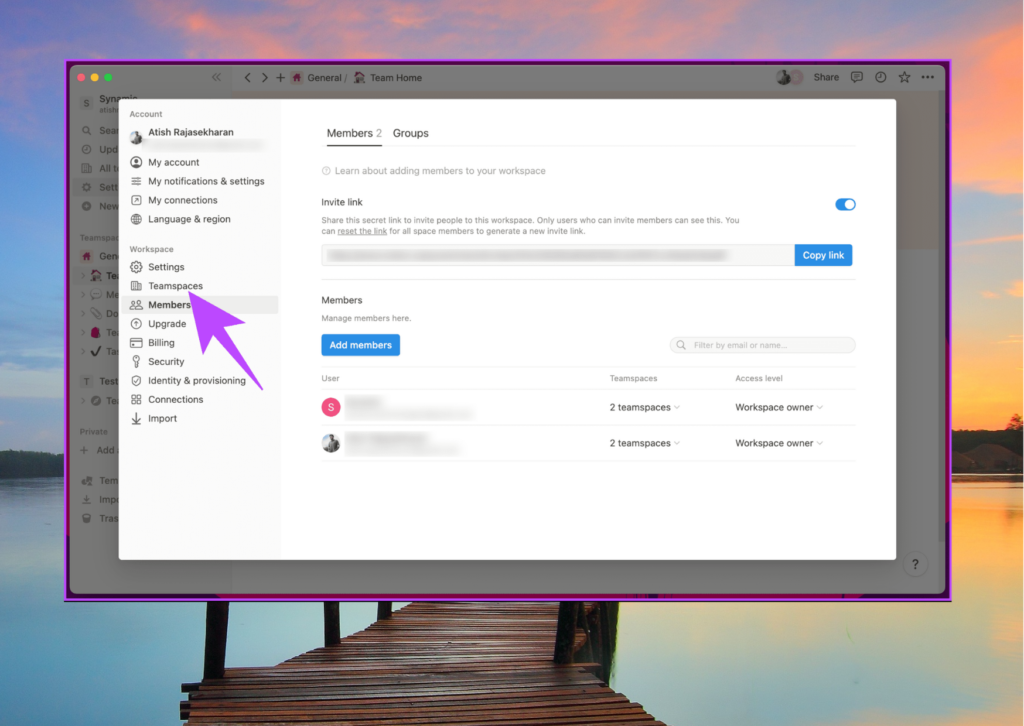
First, access the Notion application or website and locate the ‘Settings & members’ option on the left panel.
Caution: Prior to advancing to the subsequent step, verify that you are in the appropriate workspace.
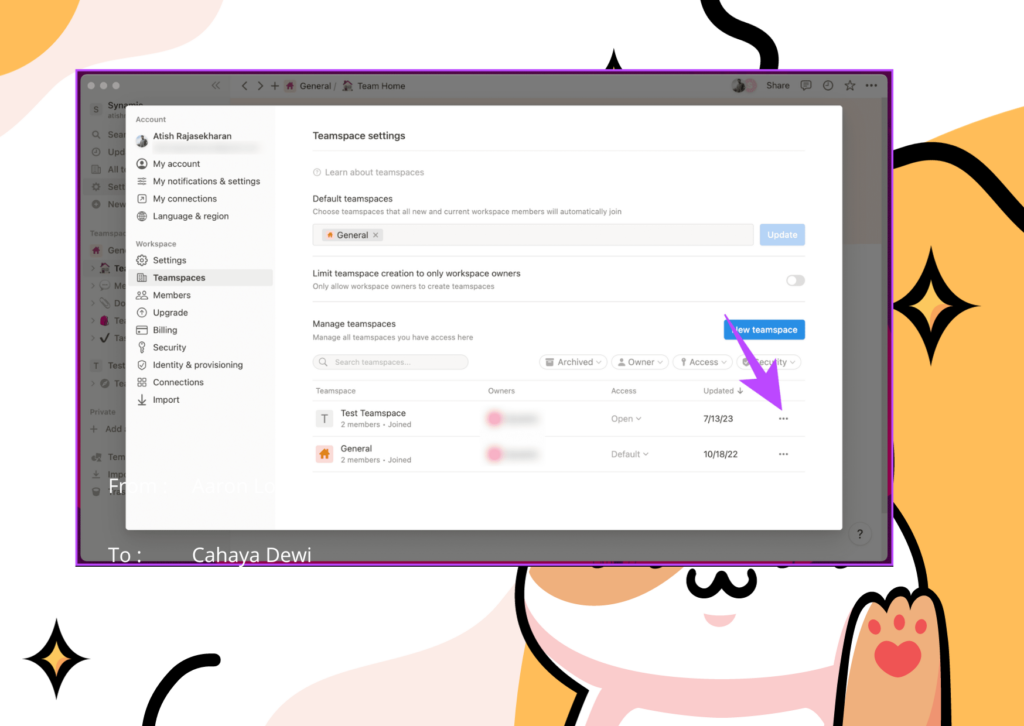
Step 2: Navigate to the Teamspaces option located in the Workspace area of the left pane.
Step 3: Go to the Teamspace you wish to exit and select the three-dot icon.
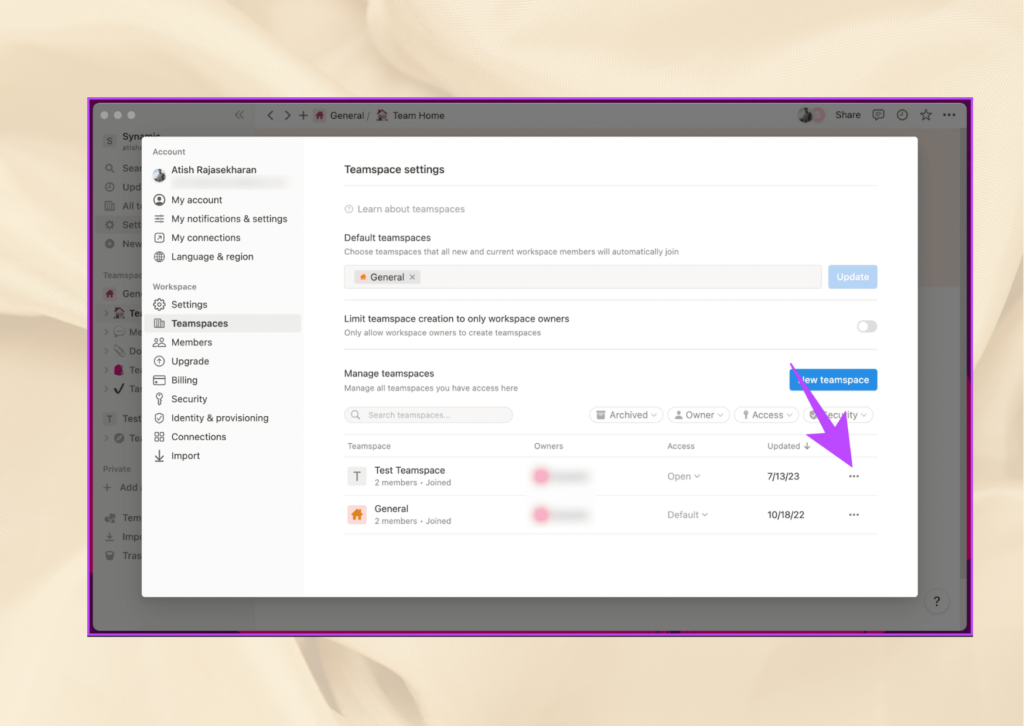
Please be aware that it is not possible to exit the default teamspace, which, in our specific situation, is referred to as General.
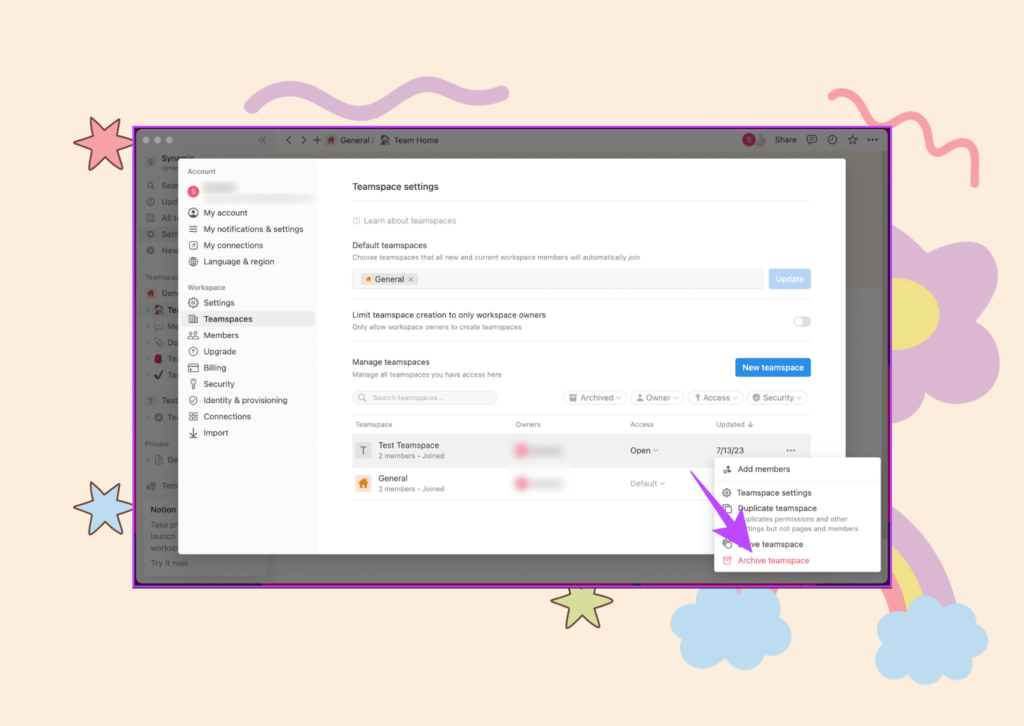
Step 4: Choose “Leave teamspace” from the drop-down menu.
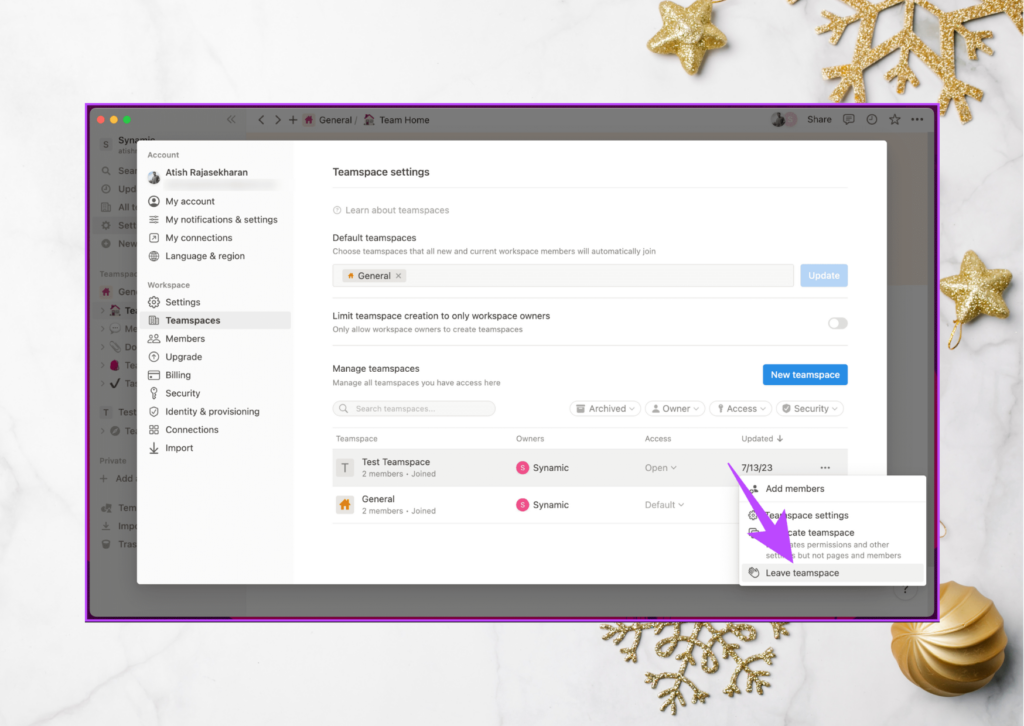
Choose the option “Leave teamspace.”
Step 5: In the prompt ‘Are you certain you wish to exit [teamspace name]?’ Click the “Leave Teamspace” button to confirm your action.
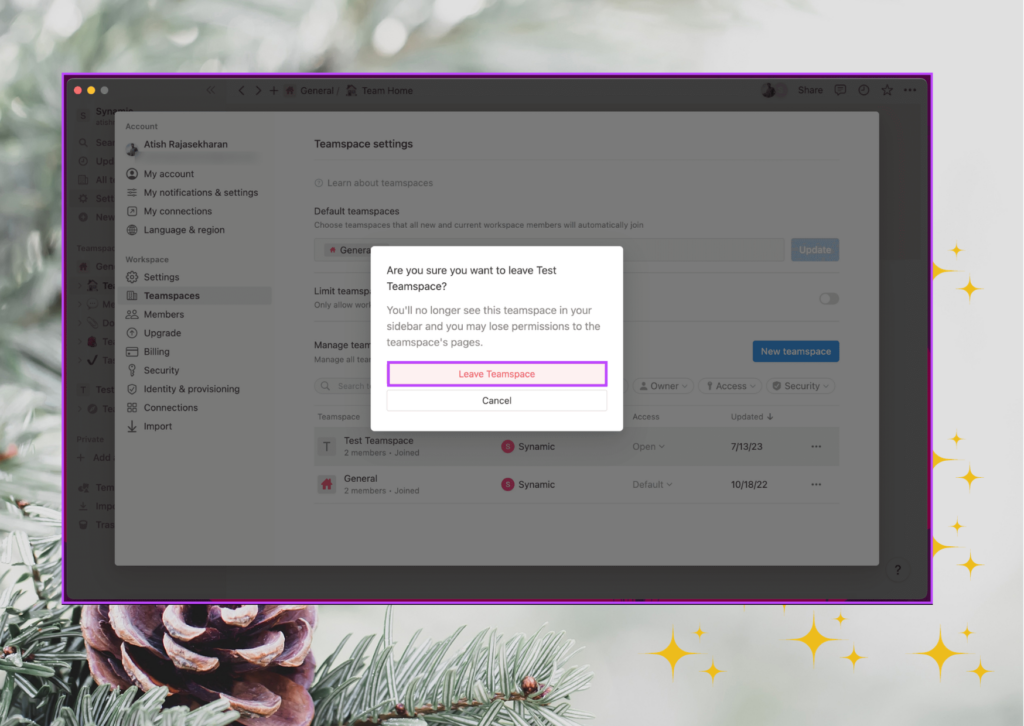
Here it is. You will be immediately removed from the teamspace. Please be aware that upon joining, you will be linked to the workspace and become a member of the default teamspace. Regrettably, it is not possible to exit a workspace using the Notion mobile application.
If you wish to retain the workspace without leaving it, but rather archive it, please proceed with reading.
GUIDE TO ARCHIVING TEAMSPACE IN NOTION
What does archiving a teamspace entail in Notion? If you have no further use for the material within a teamspace but wish to save it for reference or historical reasons, it is advisable to archive it rather than delete it. Archiving enables the preservation of content while eliminating its active utilization. Archived teamspaces remain accessible and searchable, but any alterations or adjustments are prohibited.
It is crucial to emphasize that you need to reach out to the Notion support team within a 30-day timeframe after canceling your account in order to commence the recovery procedure. Notion is unable to help you retrieve your deleted account beyond this specified period. If you have not received a response after sending an email, consider contacting Notion Support for assistance.
To begin, launch the Notion application or access the Notion website on your Windows or Mac computer. Then, navigate to the ‘Settings & members’ section located in the left panel.
Caution: Prior to proceeding to the subsequent step, verify that you are in the appropriate workspace.
You will navigate to the Members section under the Settings page.
Step 2: Navigate to the Settings option located in the Workspace area on the left side of the screen.
Step 3: Navigate to the Danger Zone area on the right panel and select the ‘Delete whole workspace’ button.
Step 4: Enter the desired workspace name in the pop-up and select ‘Permanently delete workspace’ to delete it.
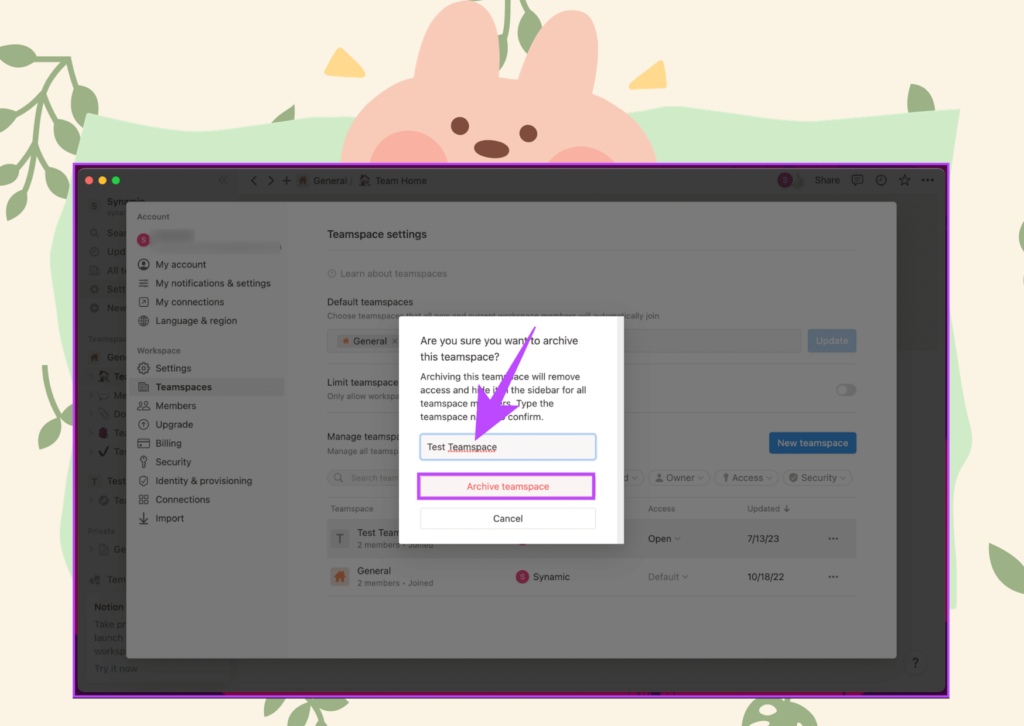
Step 5: In the prompt asking “Are you certain you wish to archive this teamspace?”, choose the option “Archive teamspace” to confirm your decision.
That is the entirety of it. You will be promptly relocated from the workspace, and all the associated pages will be erased. Regrettably, the mobile app of Notion does not provide the option to erase the workspace.
However, if you wish to discontinue using a workspace without deleting it, you may easily do so using the Notion mobile app. The procedure is straightforward; please continue reading.
Frequently Asked Questions about Deleting Notion Account:
- Is it possible to register a new Notion account after deleting a prior one?
Absolutely, it is possible to establish a fresh Notion account subsequent to the deletion of your existing one. Indeed, it is possible to utilize the identical email address to establish a fresh account. By deleting your Notion account, all of your data and related information will be permanently erased, giving you the option to begin anew with a new account if desired. - Is it possible to register a new Notion account with the same login after deleting my previous account?
Deleting your Notion account results in the permanent unavailability of the linked username. To establish a fresh account, it is important to select an alternative username.
By adhering to the methods provided in this article, you can securely and definitively terminate your Notion account, thereby liberating your digital storage capacity. We trust that this tutorial has effectively aided you in the process of deactivating your Notion account.