

You can become a planner for everything using the different templates and project views on Notion. You can also flexibly start with a large blank page instead of using a pre-built template. In this article, we will introduce some templates in Notion that will help you to track tasks, habits and plan for a month. Let’s get started too!
- USE A TO-DO TEMPLATE
Templates play an important role in Notion’s ecosystem. They can be a default template or an added third party template made by the community. The To-Do template is one of the templates you can use to manage tasks. Update the template with these steps:
Step 1: Open the Notion app on your PC or Mac and create a workspace.
Step 2: Click the ‘Add a page’ option in the left sidebar and Notion will open a blank page for you.

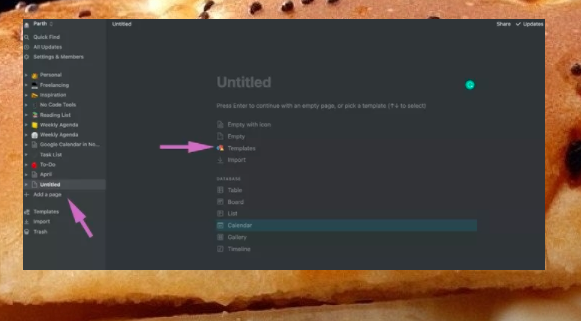
Step 3: Click ‘Templates’ from the blank Notion page and it will open the default Notion template gallery.
Step 4: You can find the To-Do template in the Engineering section. Click the Import button to add it to your Notion page.


The To-Do template is an upgraded version of Trello with related functions. However, its essence is still based on the kanban style table.

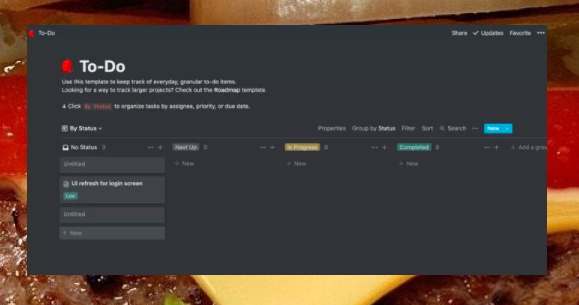
You can add relevant names to each table section. For tags, just click on the default tag and start adding details.
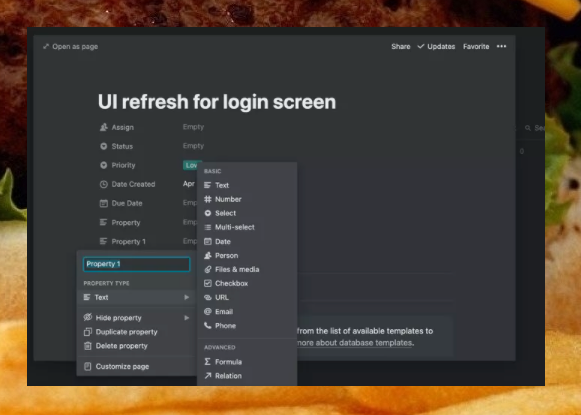
You can add information like specified user, status, priority, date, comment,… In addition, ‘Add a property’ and integrate other data such as Email, Phone dialog, URL, Formula, Relationship, … will help you a lot in management. This is Notion’s stronger point than Trello. It depends on your use case how much information you want to pack in the tag.

As you make progress with the card, simply drag and drop the card into the relevant section.
- WEEKLY AGENDA TEMPLATE
With larger projects, Notion still operates professionally. The Weekly Agenda template is one solution for you.
Step 1: Open Notion and create a workspace.
Step 2: Create a new page from the left sidebar and choose templates from the blank Notion page.
Step 3: You will find the Weekly Agenda template under the Design section. Import it to your Notion page.

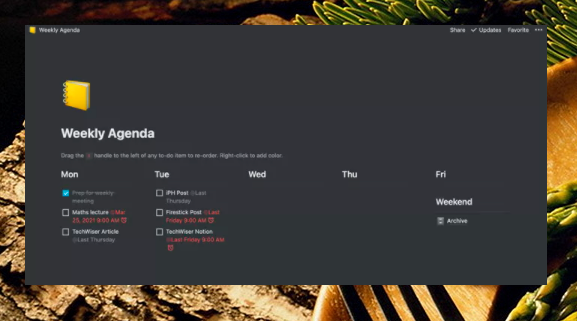
Step 4: Start adding tasks to a weekday. You can add as many tasks to a particular day of the week.
After entering the information you need to store in the template, you can enable reminders for each task that you need. Go to a task for which you want to be reminded. Use the ‘/’ command and type remind. The Notion will display the Date or Reminder option. Click on it.


You can choose Today or Tomorrow. To change due date and time click on current date option, menu will pop up to change date and time. For long tasks, you can also specify an End Date.
Repeat the process for all tasks and you’ll have a powerful task management system in Notion.
- CREATE A CALENDAR IN NOTION
While Notion doesn’t integrate as strongly with Google Calendar as you’d expect, it works perfectly fine for the average user. Creating a calendar on Notion will help you replace Google Calendar if you don’t want to use too many apps.
Step 1: Create a workspace from scratch in Notion.
Step 2: Select Calendar in the Database option in Notion.
Step 3: Notion will create a calendar view on the page.


Step 4: Click the + icon under any date and start adding entries.
Step 5: For details, you can set title, date, tags and insert attributes like Email, Phone,…
You can view them in different modes by ‘Add a view’ option and you can choose from different views like Timeline, Table, List and Collection. Among them, we like the Timeline view because it’s perfectly fine with GT usage.


Also, I love how I can simply drag and drop items from day to day. That’s what separates Notion from other software on the market.